Weaving Pleats – Blog Post
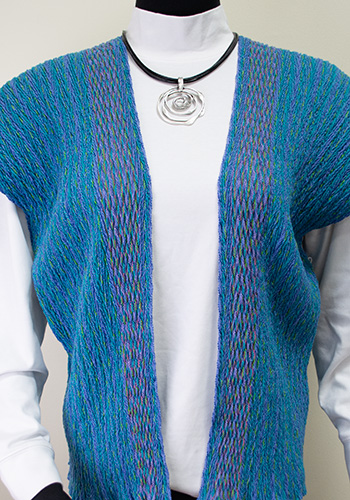
As part of our Master Weaver Series, Dianne Totten designed the delightful Pretty in Pleats vest. The kit uses 10/2 Tubular Spectrum yarn in a luscious riot of colors for the warp, and 8/2 Orlec for the weft. Throughout this fabric, you weave a plain-weave ground cloth using the Orlec yarn. Every 4 threads, you add a pick of 10/2 Mercerized cotton yarn to use as a pull thread. When you have finished all the weaving and have taken the fabric off the loom, you scrunch up the fabric using the pull threads. The final step to creating the permanently pleated fabric is to steam the fabric. The steam causes the Orlec to set the pleated fabric. When you remove the pull threads, the pleats remain in the fabric. Woven shibori is another magical method to get dimensional cloth!
Michele test drove the new Pretty in Pleats vest kit for everyone and has (as always) a few tricks of her own to share with you.
By Michele Belson
Choosing the length of your Pretty in Pleats Vest (or any other top)
The wonderful thing about weaving fabric for clothing is YOU are able to make choices. You choose how long the garment will be and how much ease the garment will have. You choose where to put that ease, and more. We love Diane Totten’s version of this vest, and she looks fabulous in it. For me and for Katzy the chosen length feels a little short. This is just personal preference. And there is enough yarn included in the kit to make a longer warp, so why not!
Please note: We have included enough yarn in the kit to make a 4.5-yard (162”) warp and enough weft to weave 2 panels up to 60” in length. If you want to make the panels longer, you will need more yarn.
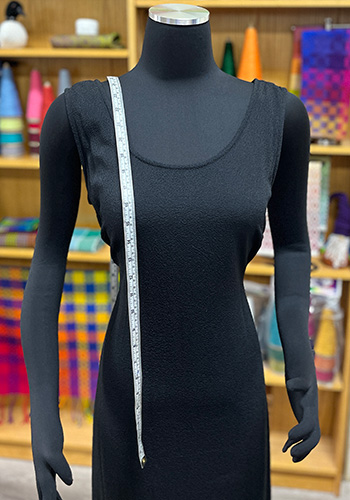
Check to see how the length of the vest will fit on your body. Use a soft tape measure and let it drape down from the center of the top of your shoulder. Pick the point on your body where you want the vest to end and make a note. Or you can measure the length from the shoulder to the hemline of a garment that fits you well and make a note of that length. Plan each vest panel to be twice this length plus 3” for take-up and shrinkage. For Diane this measurement was 58”, for us it was 60”. YOU WILL NEED 2 OF THESE PANELS plus loom waste to make your complete vest.
The Pretty in Pleats vest is an ideal place to use a Warp Color Order Chart.
A Warp Color Order Chart is a shorthand way to describe how to make the warp. The yarn colors are written out on one side of the chart, and the numbers in the chart represent warp ends. You move across the chart, winding the number of warp ends listed, in the color order that is shown in the chart. For example, in the Pretty in Pleats Warp Color Order Chart shown below, there are 5 warp colors. The warp colors are listed on the left side of the chart. To wind the warp, start on the left side of the chart and wind 10 ends of Periwinkle. Then wind one end of Periwinkle and one end of Teal together, five times. Then wind 10 ends of Teal. And so on across the warp.
The Pretty in Pleats vest is an ideal place to use a Warp Color Order Chart. We promise it will make winding the warp easier. We have done it for you, but without writing out all 9 repeats. Really consider either writing it out 9 times or making multiple photocopies of the Warp Color Order Chart (yes, really) for each of the 9 body repeats. This is a complex repeat, and I was really glad I wrote it out.

A word about the pulling threads.
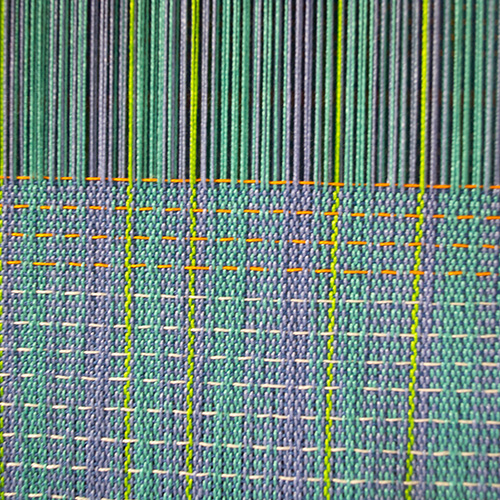
Throughout this fabric, you will be weaving a plain-weave ground cloth using the Orlec yarn. Every 4 threads, you will add a pick of 10/2 Mercerized cotton yarn to use as a pull thread.
I tested several options of pull threads. 20/2 Mercerized cotton was easy to use, and strong enough to do the pulling. However, the groves it left in my fingers as I was pulling at the end were painful!! 10/2 Mercerized cotton worked well and though I worried it would leave marks in the fabric after steaming, it didn’t. It pulled easily, didn’t break and wasn’t quite as hard on my hands. I also tested Fine Lyte Hemp yarn. It is strong but hung up while I was pulling and wasn’t the best option. Because there is already 10/2 Mercerized cotton in the vest kit, it was the logical choice to use for the pull threads.
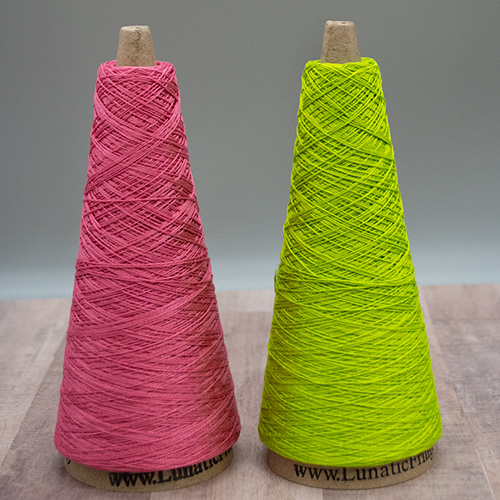
Each kit has MORE than enough Coral and 5 Green Yellow to use as pulling threads as well as the warp yarns. BUT if you have a supply of 10/2 Mercerized cotton bobbins hanging around this is a great time and way to use them up. It is easier to remove the pull threads if they are a contrasting color and value. The Coral shows up well. Amazingly the 5 Green Yellow does not show up as well, but it is still an acceptable pull thread.
And more words about the pull threads.
In woven shibori, the pull thread picks will always be woven using the pattern thread treadles. If you use two different colors of pull thread you can easily keep track of each pattern repeat by weaving one full repeat with one color, and then switch to the second color to weave a second repeat.
Don’t forget to leave a loop on one side to make it easy to get a grip on the pull threads. A surgeon’s knot (a 2 loop overhand) with a second overhand knot to secure holds well. Take care when cutting the pull threads after the fabric has been steamed. I found a seam ripper, with a sharp cutter worked better than scissors.
So very Pretty!
For this vest, the weaving was easy, pulling the threads and tying all the knots was a bit of a pain, but I really love the fabric. I was so excited about the fabric it was hard not to burn my fingers when I pulled it out of the steam pot. It was worth the wait. When the knots came out and the pleated fabric showed itself, it was magic. I’m looking forward to wearing the vest and experimenting more with Woven Shibori!!


Michele, how did you steam your fabric? Are the steaming directions included in the pattern?
Hi Mary! The fabric was steamed using a large canning pot. The directions for steaming and assembling the vest are included in the pattern!